
Tilt UI
2023
Button-less and Touch-less Smartwatch with Wrist Gesture Navigation
![]()

OVERVIEW
Tilt UI is a gesture-based user interface in the form of a wrist watch. It doesn’t include any buttons or touch navigation, so the entire UI is simply controlled by the motions of the user’s wrists. This device was motivated by asking what are the most natural ways to use wrist gestures as control, and what affordances do these gestures give.
This was the final project of the UChicago course Engineering Interactive Devices onto Printed Circuit Boards, taught by Prof. Pedro Lopes.
DOCUMENTATION
1- Warmup Exercise
This was my first time learning how to make a PCB. Before we got started on our final projects, Prof. Lopes had us design a “superpower PCB” that can be placed onto a breadboard and provide power to it through USB-C. Here’s the one I made:

schematic design

PCB design
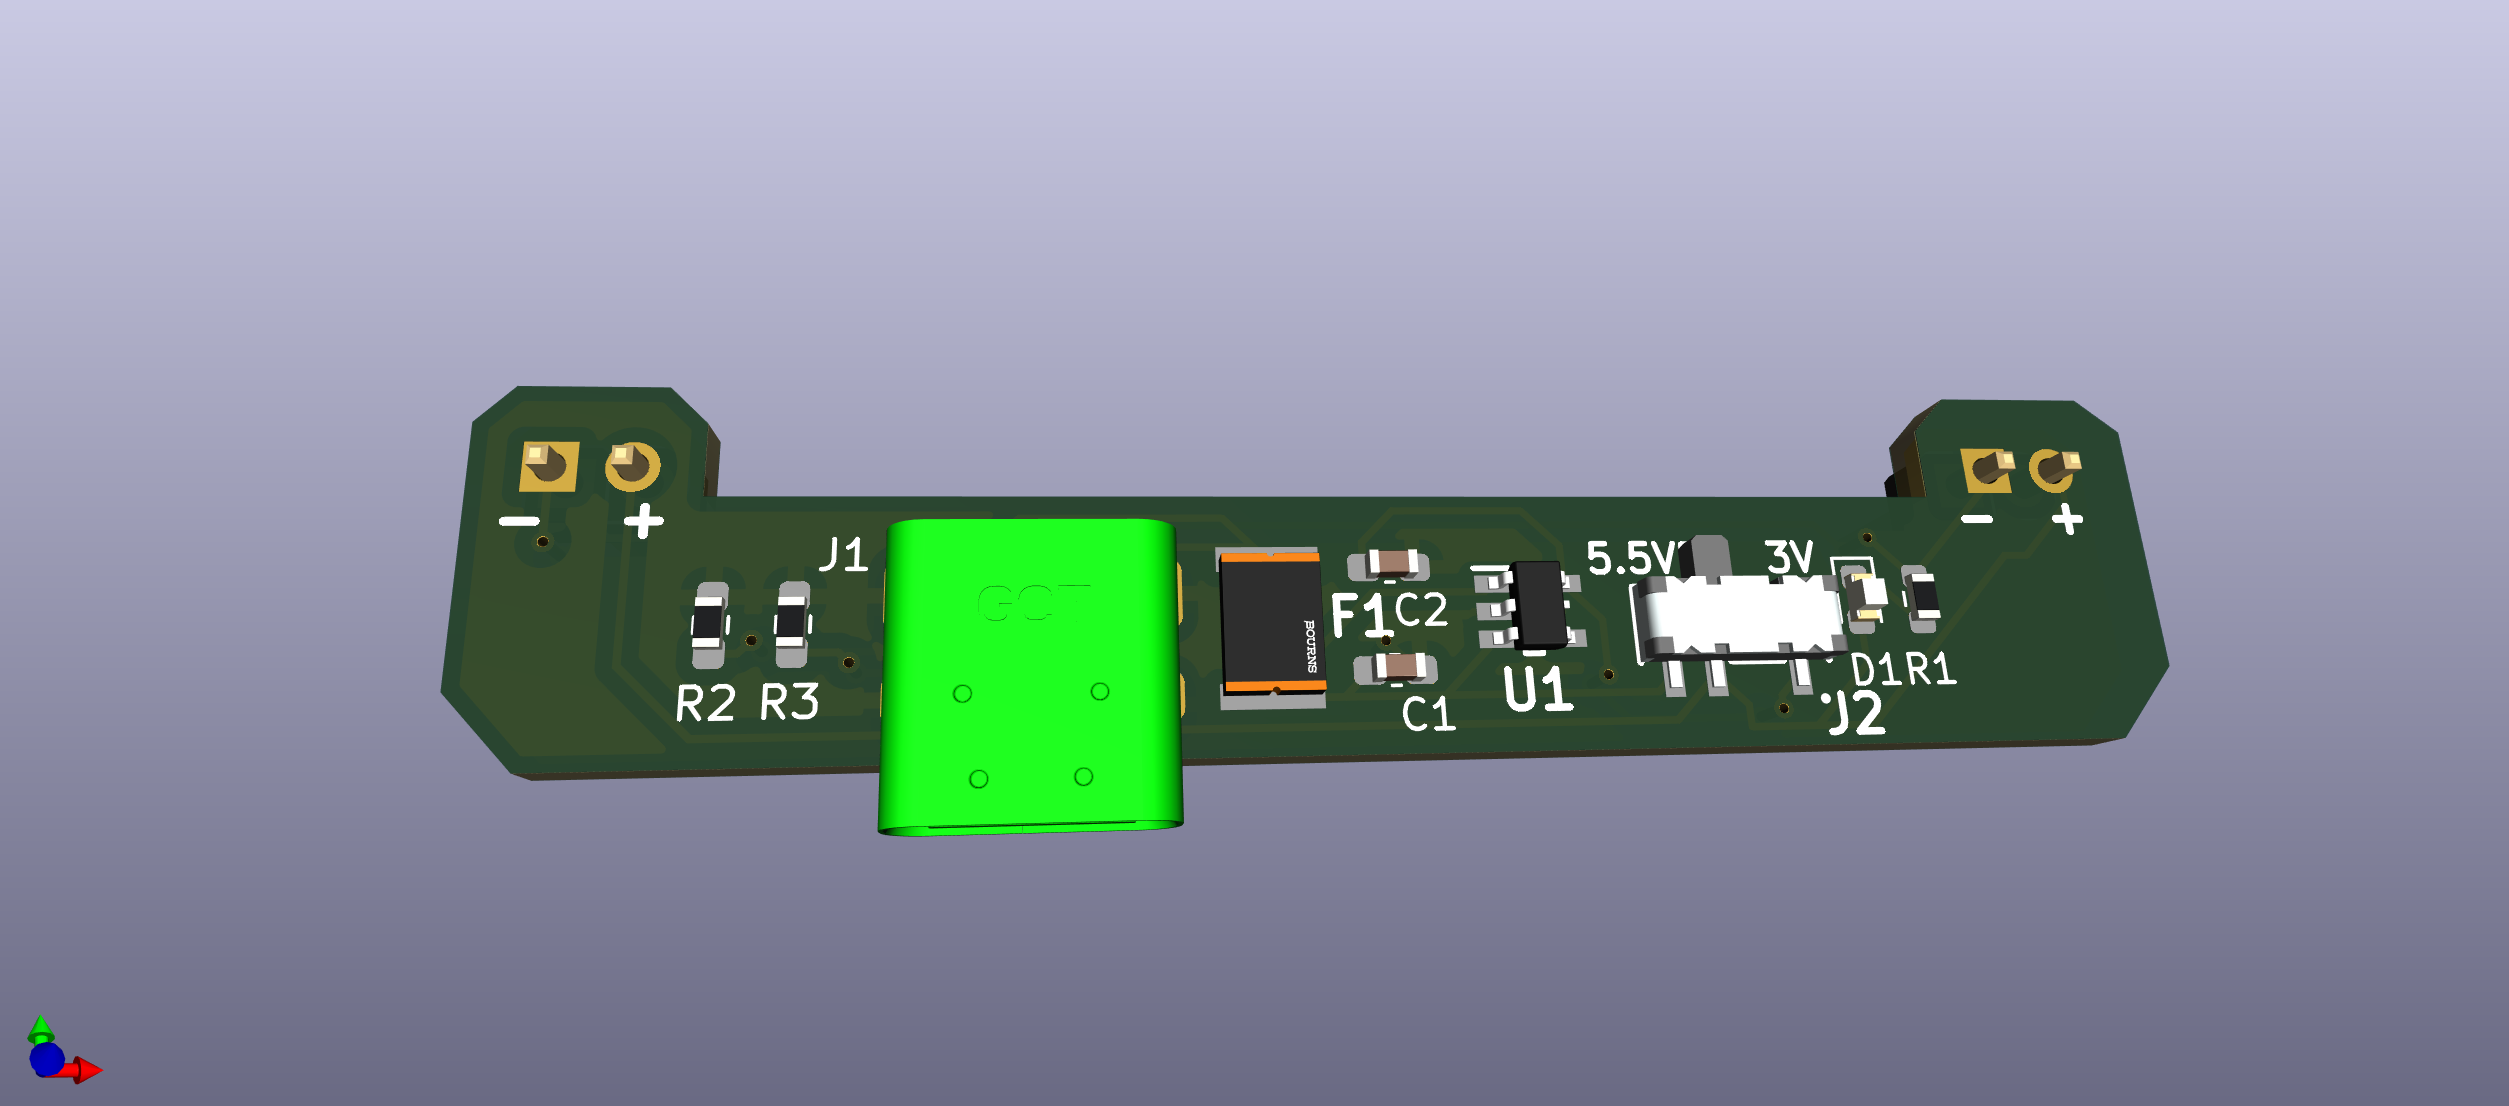
3D view
video demo
2- Schematic Design
For the assignment, we had the following requirements:
-- we must use an SAMD21 chip
-- the total budget must be less than $21
-- our device must include at least one input and one output
-- no breakout boards allowed
For my tilt UI device, I used the following components:
-- SAMD21 chip
-- USB-C
-- 1.7V lithium battery
-- input: IMU (Inertial Measurement Unit) for detecting the orientation and acceleration of the device
-- output: OLED display
Here’s the overall design:
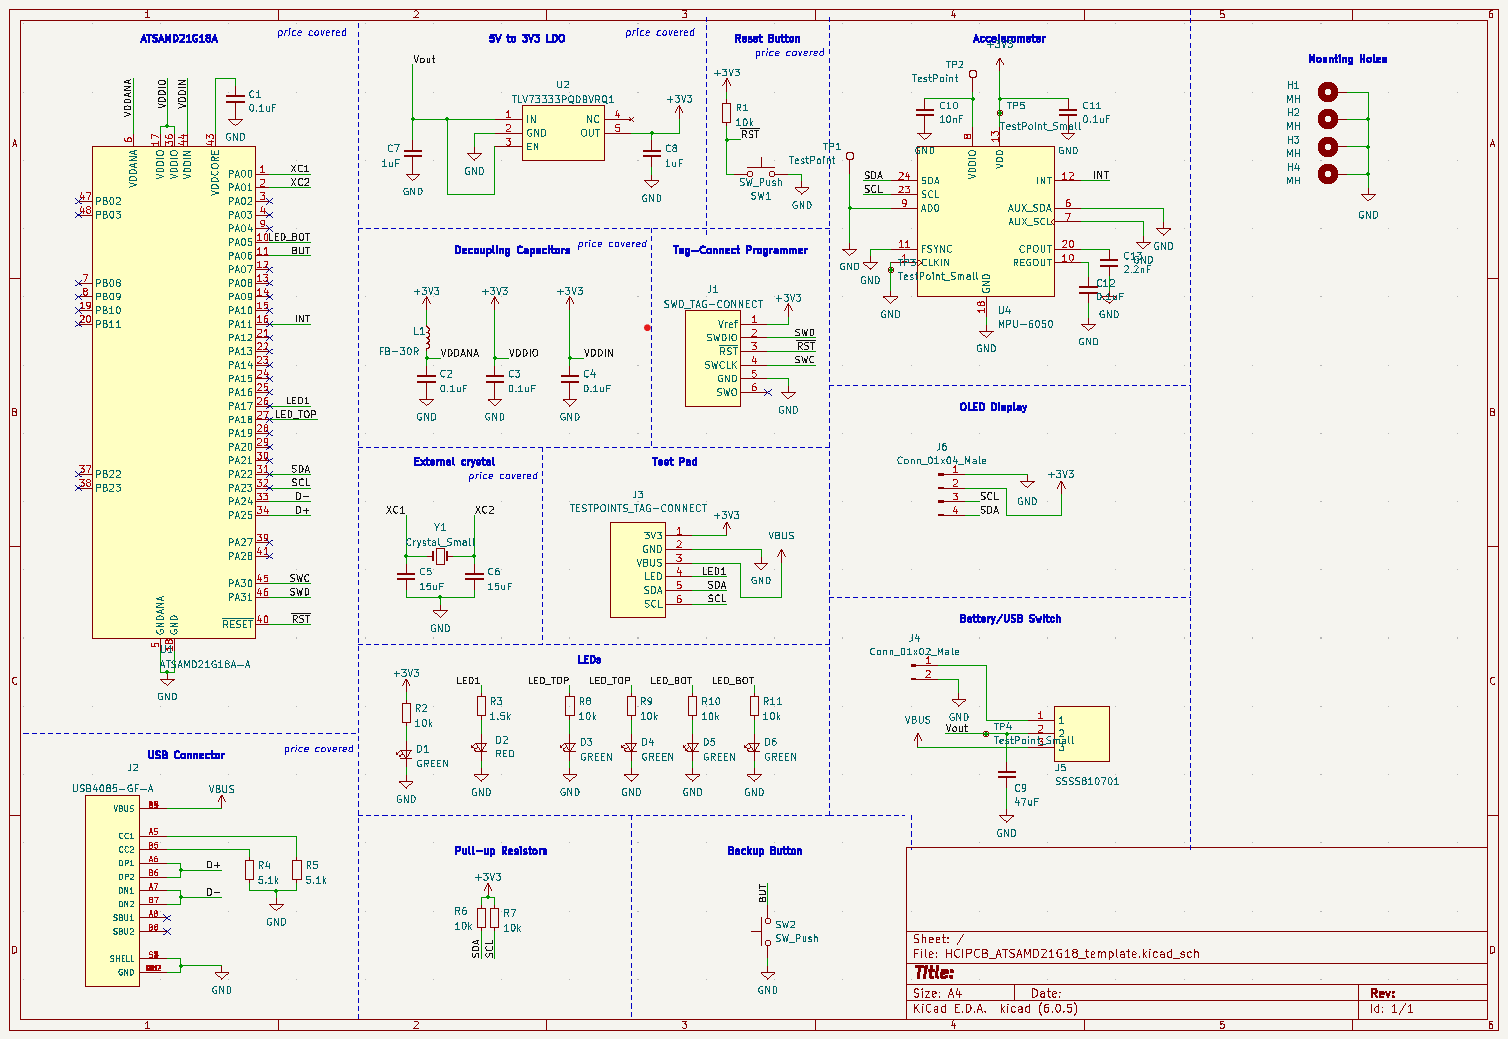 Schematic Design
 PCB Design
3- Soldering
 I first soldered the SAMD chip (which I had to desolder and solder 4 times to get right T.T)
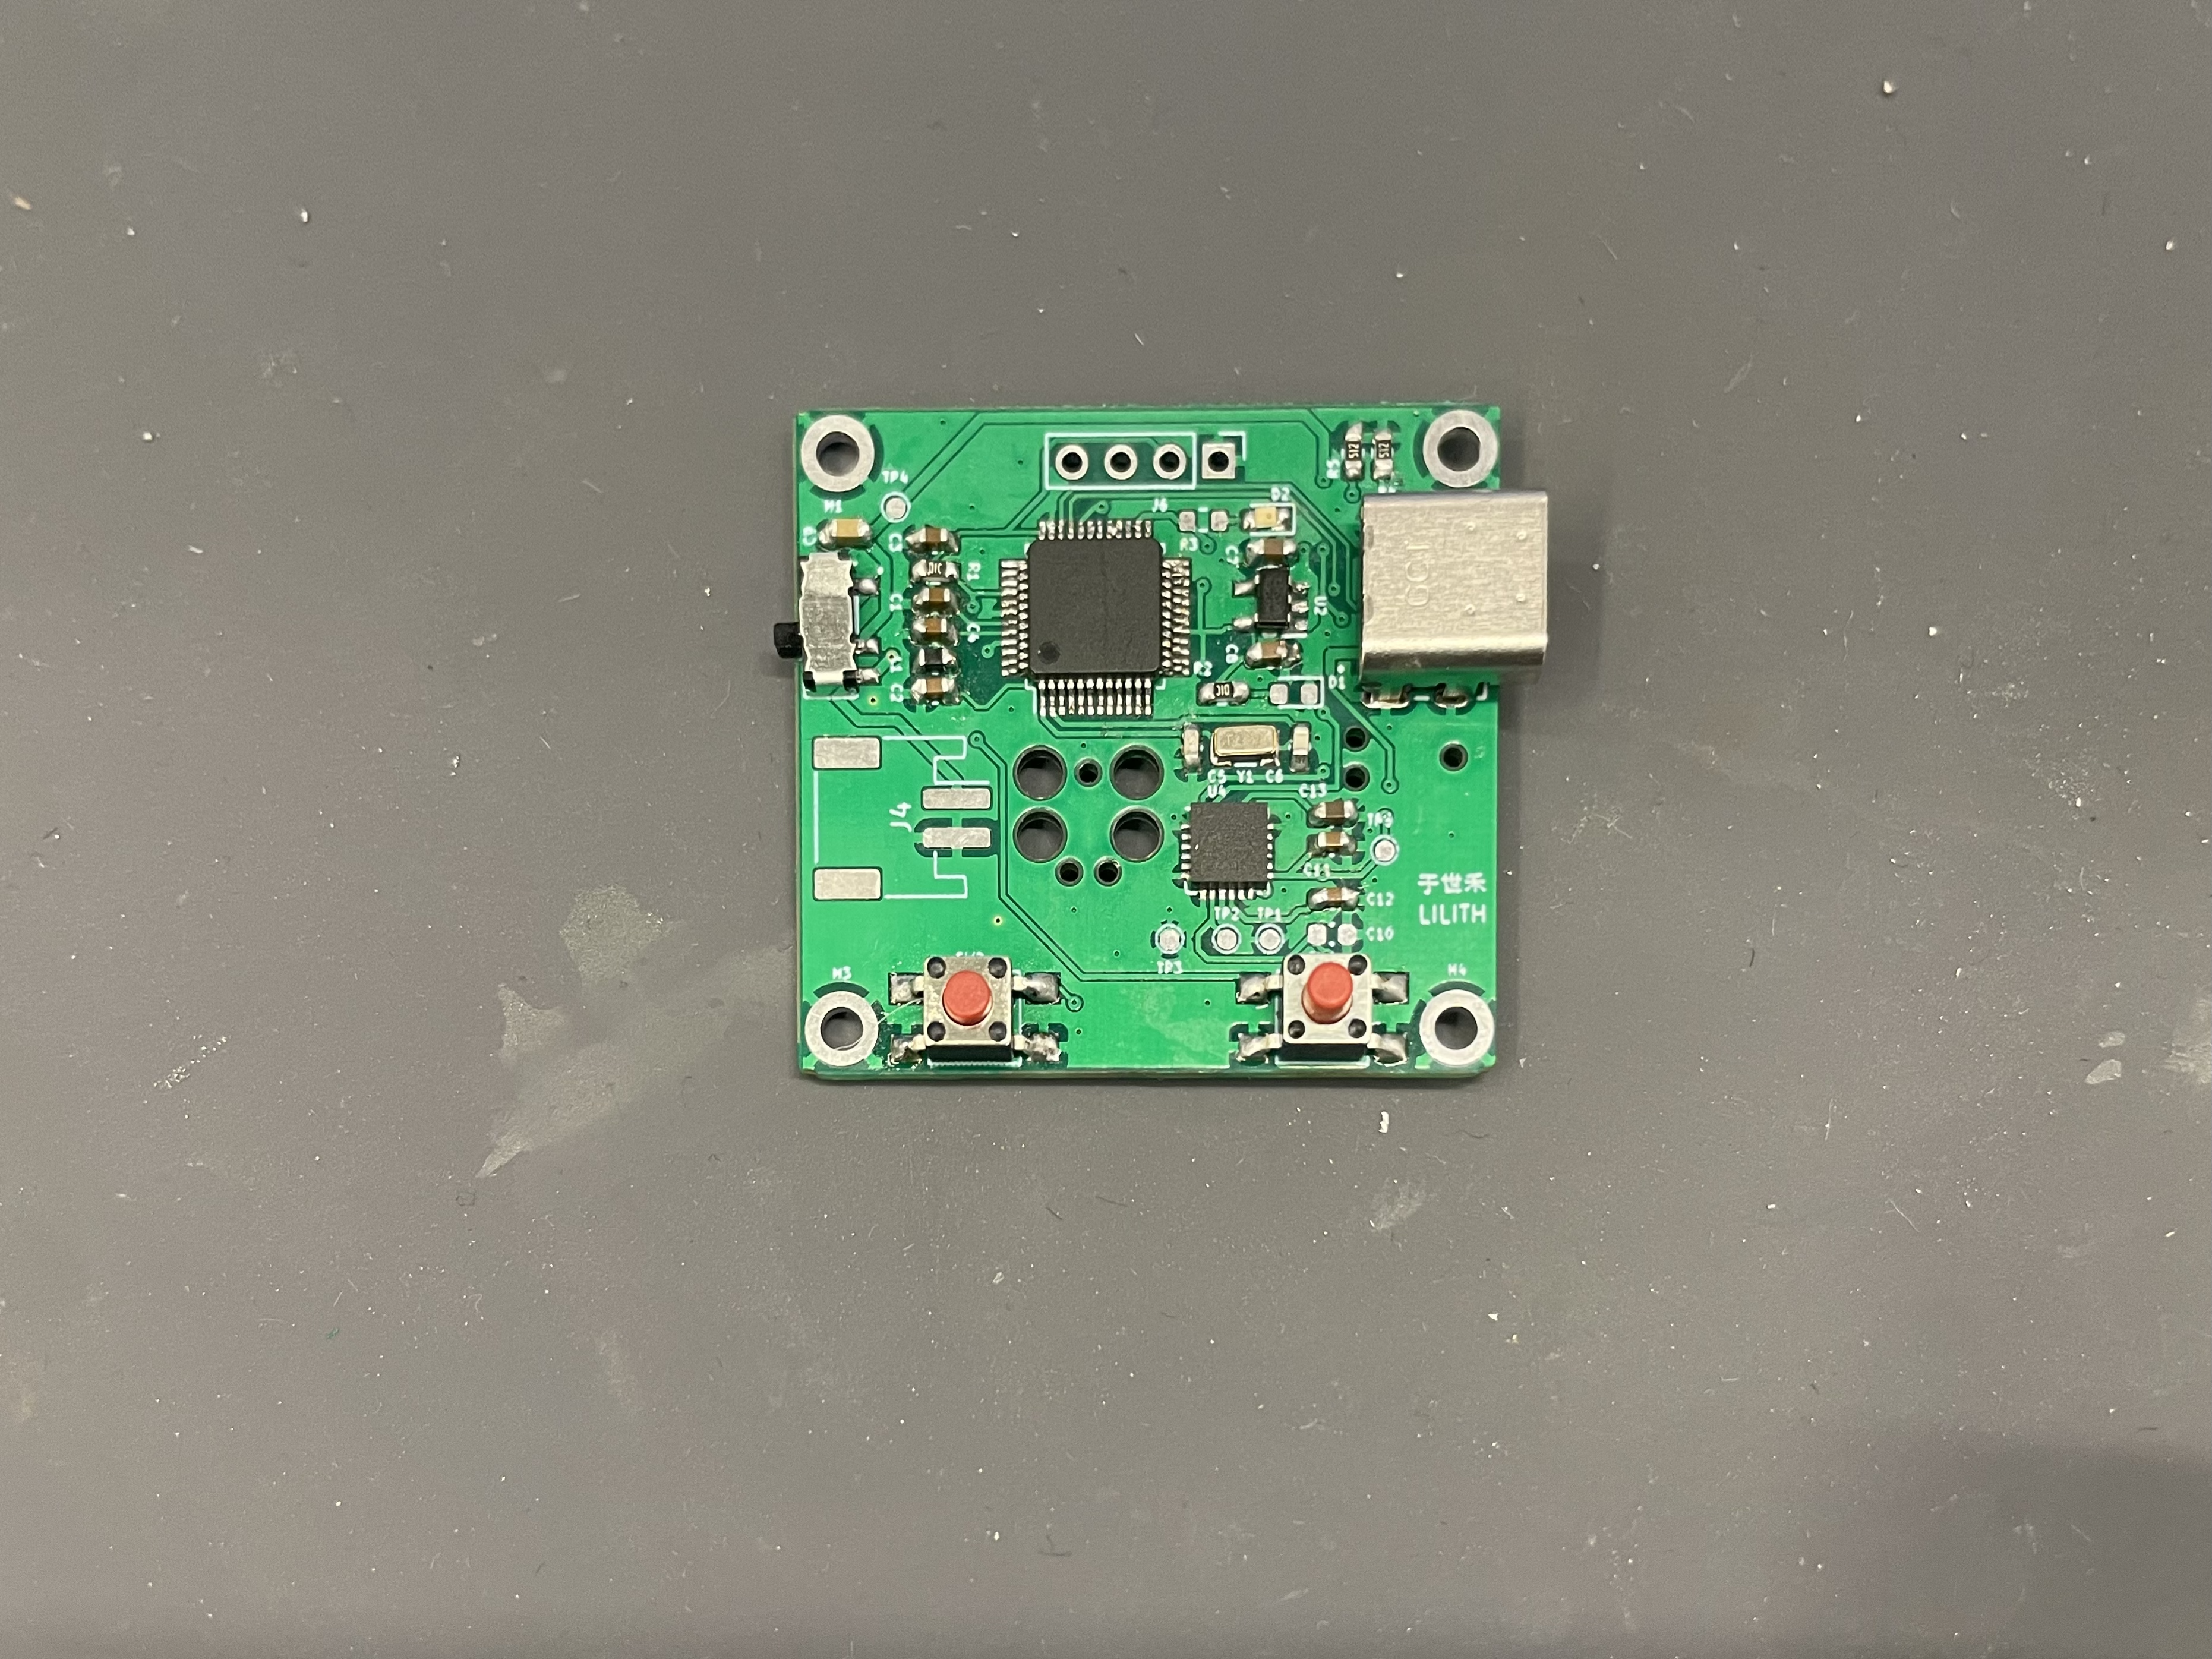 Then I soldered the rest of the components, other than the OLED display and the battery connector.
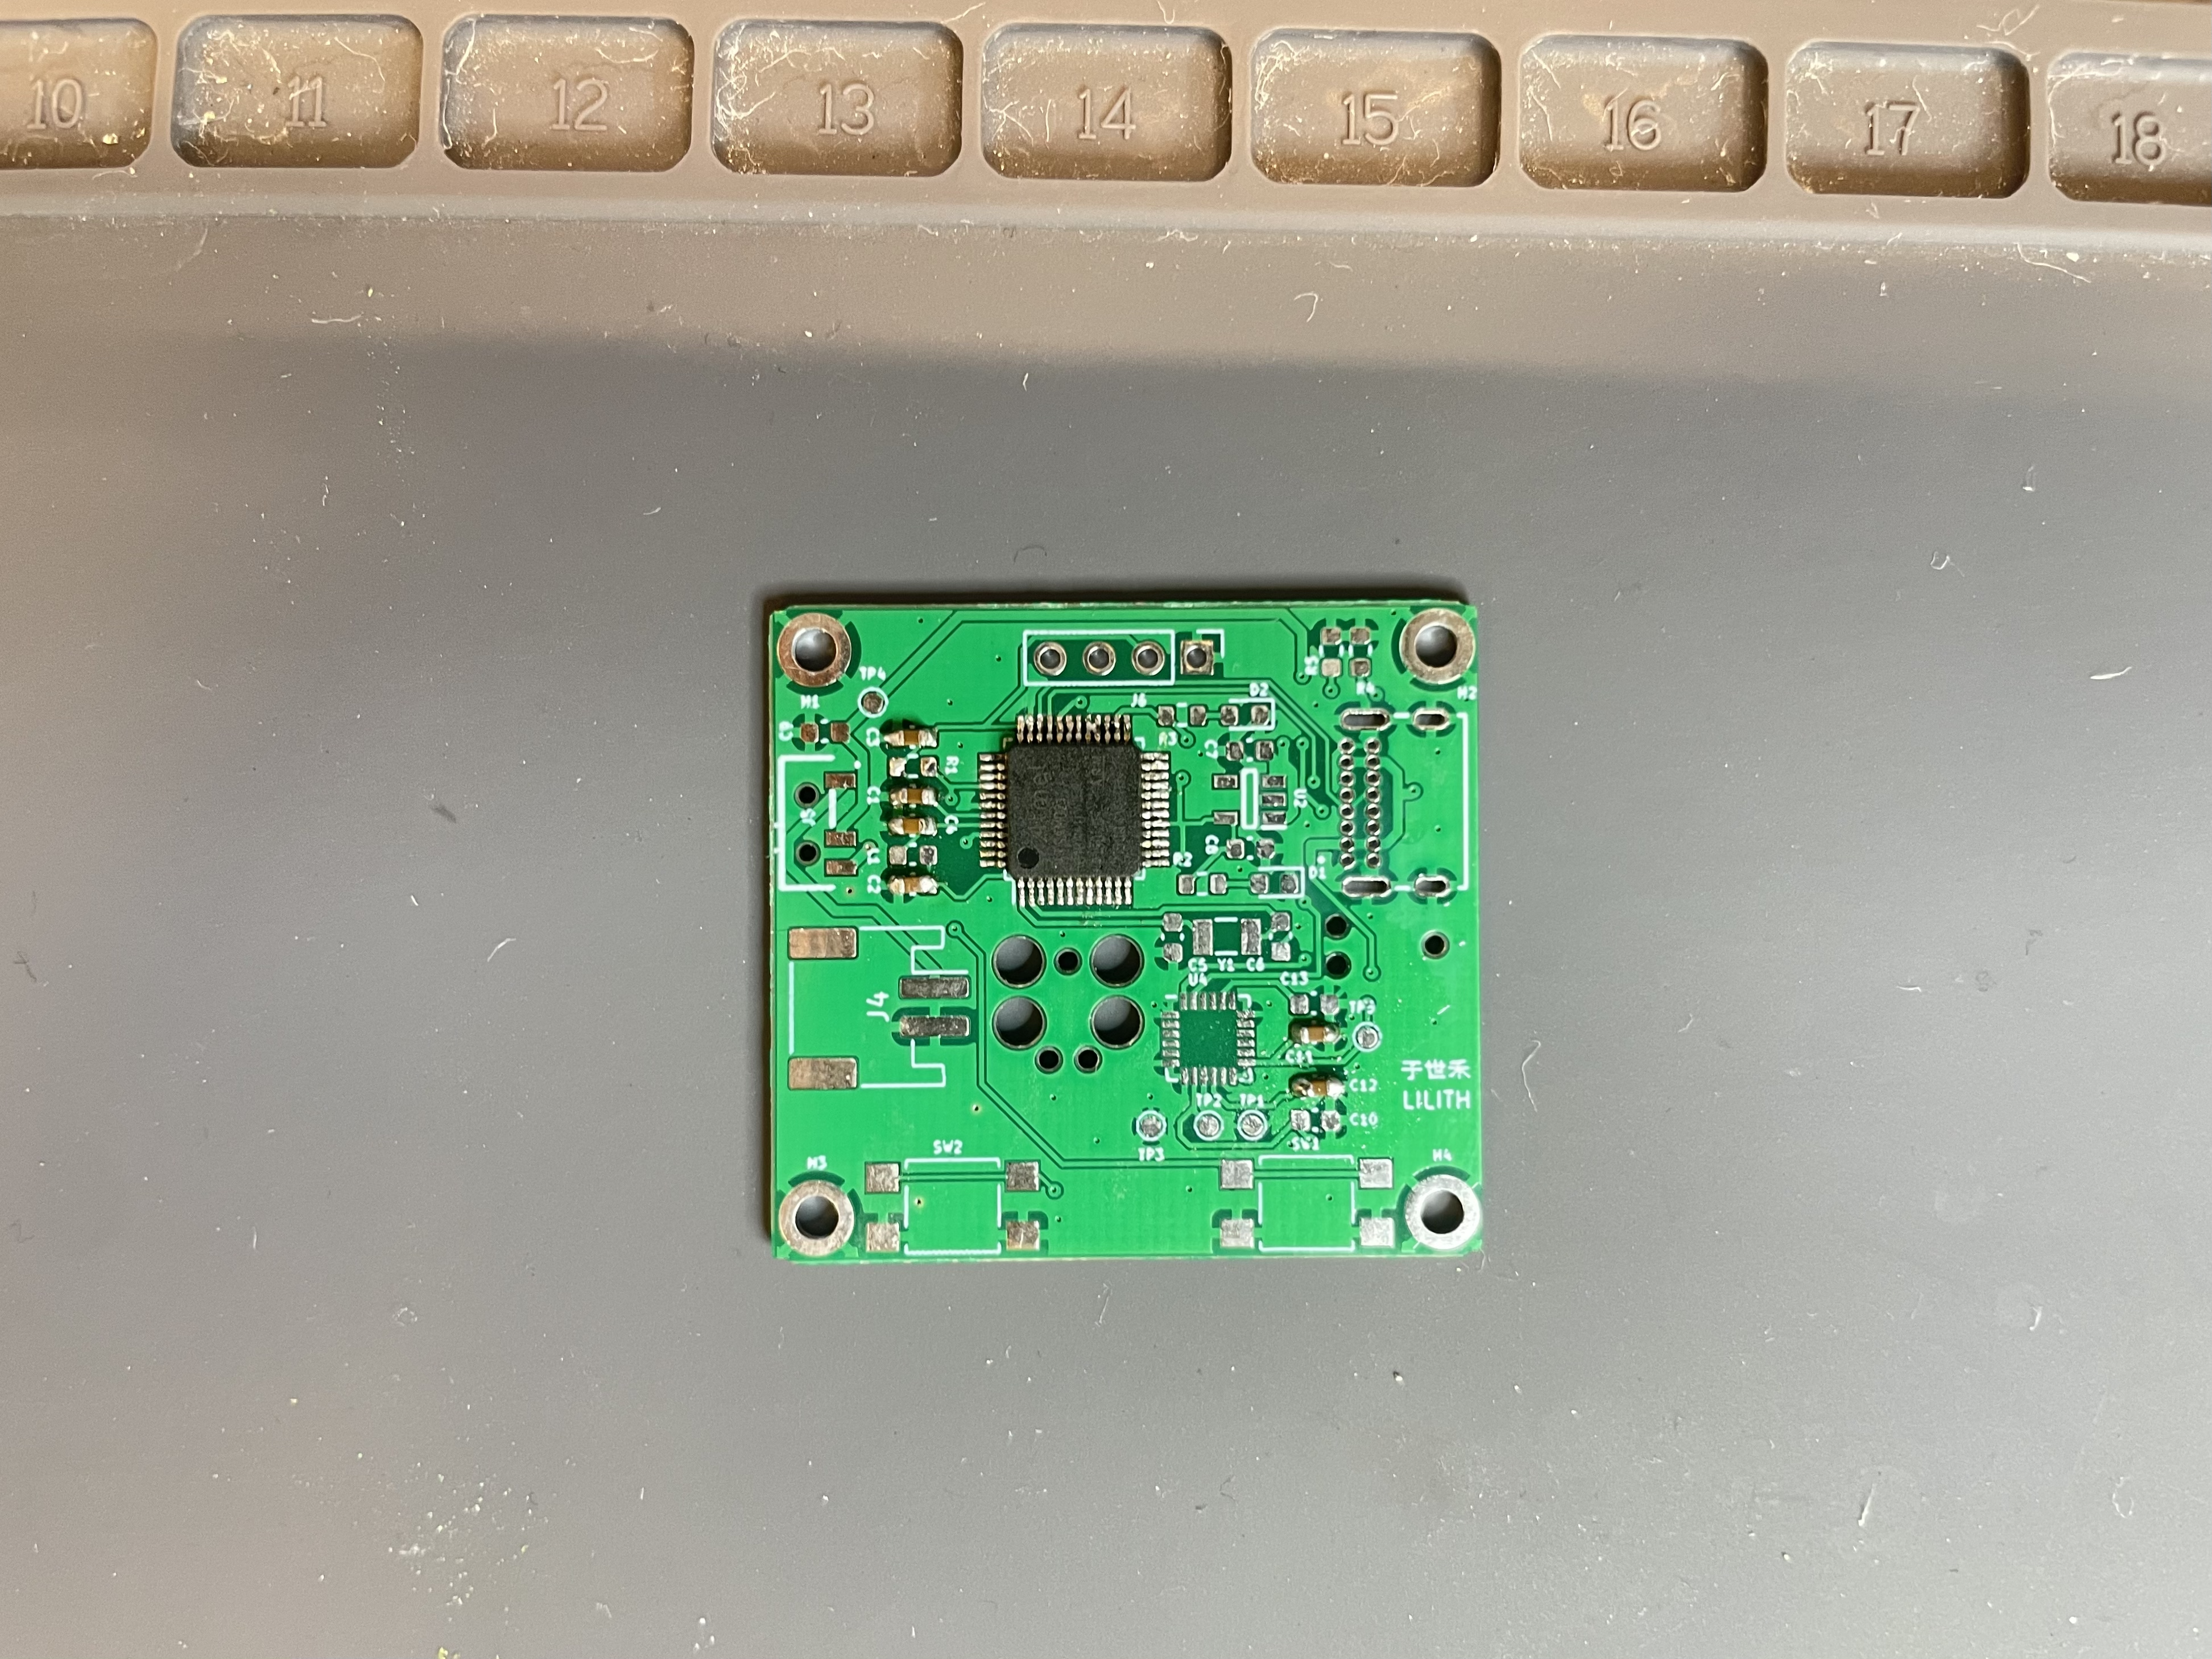
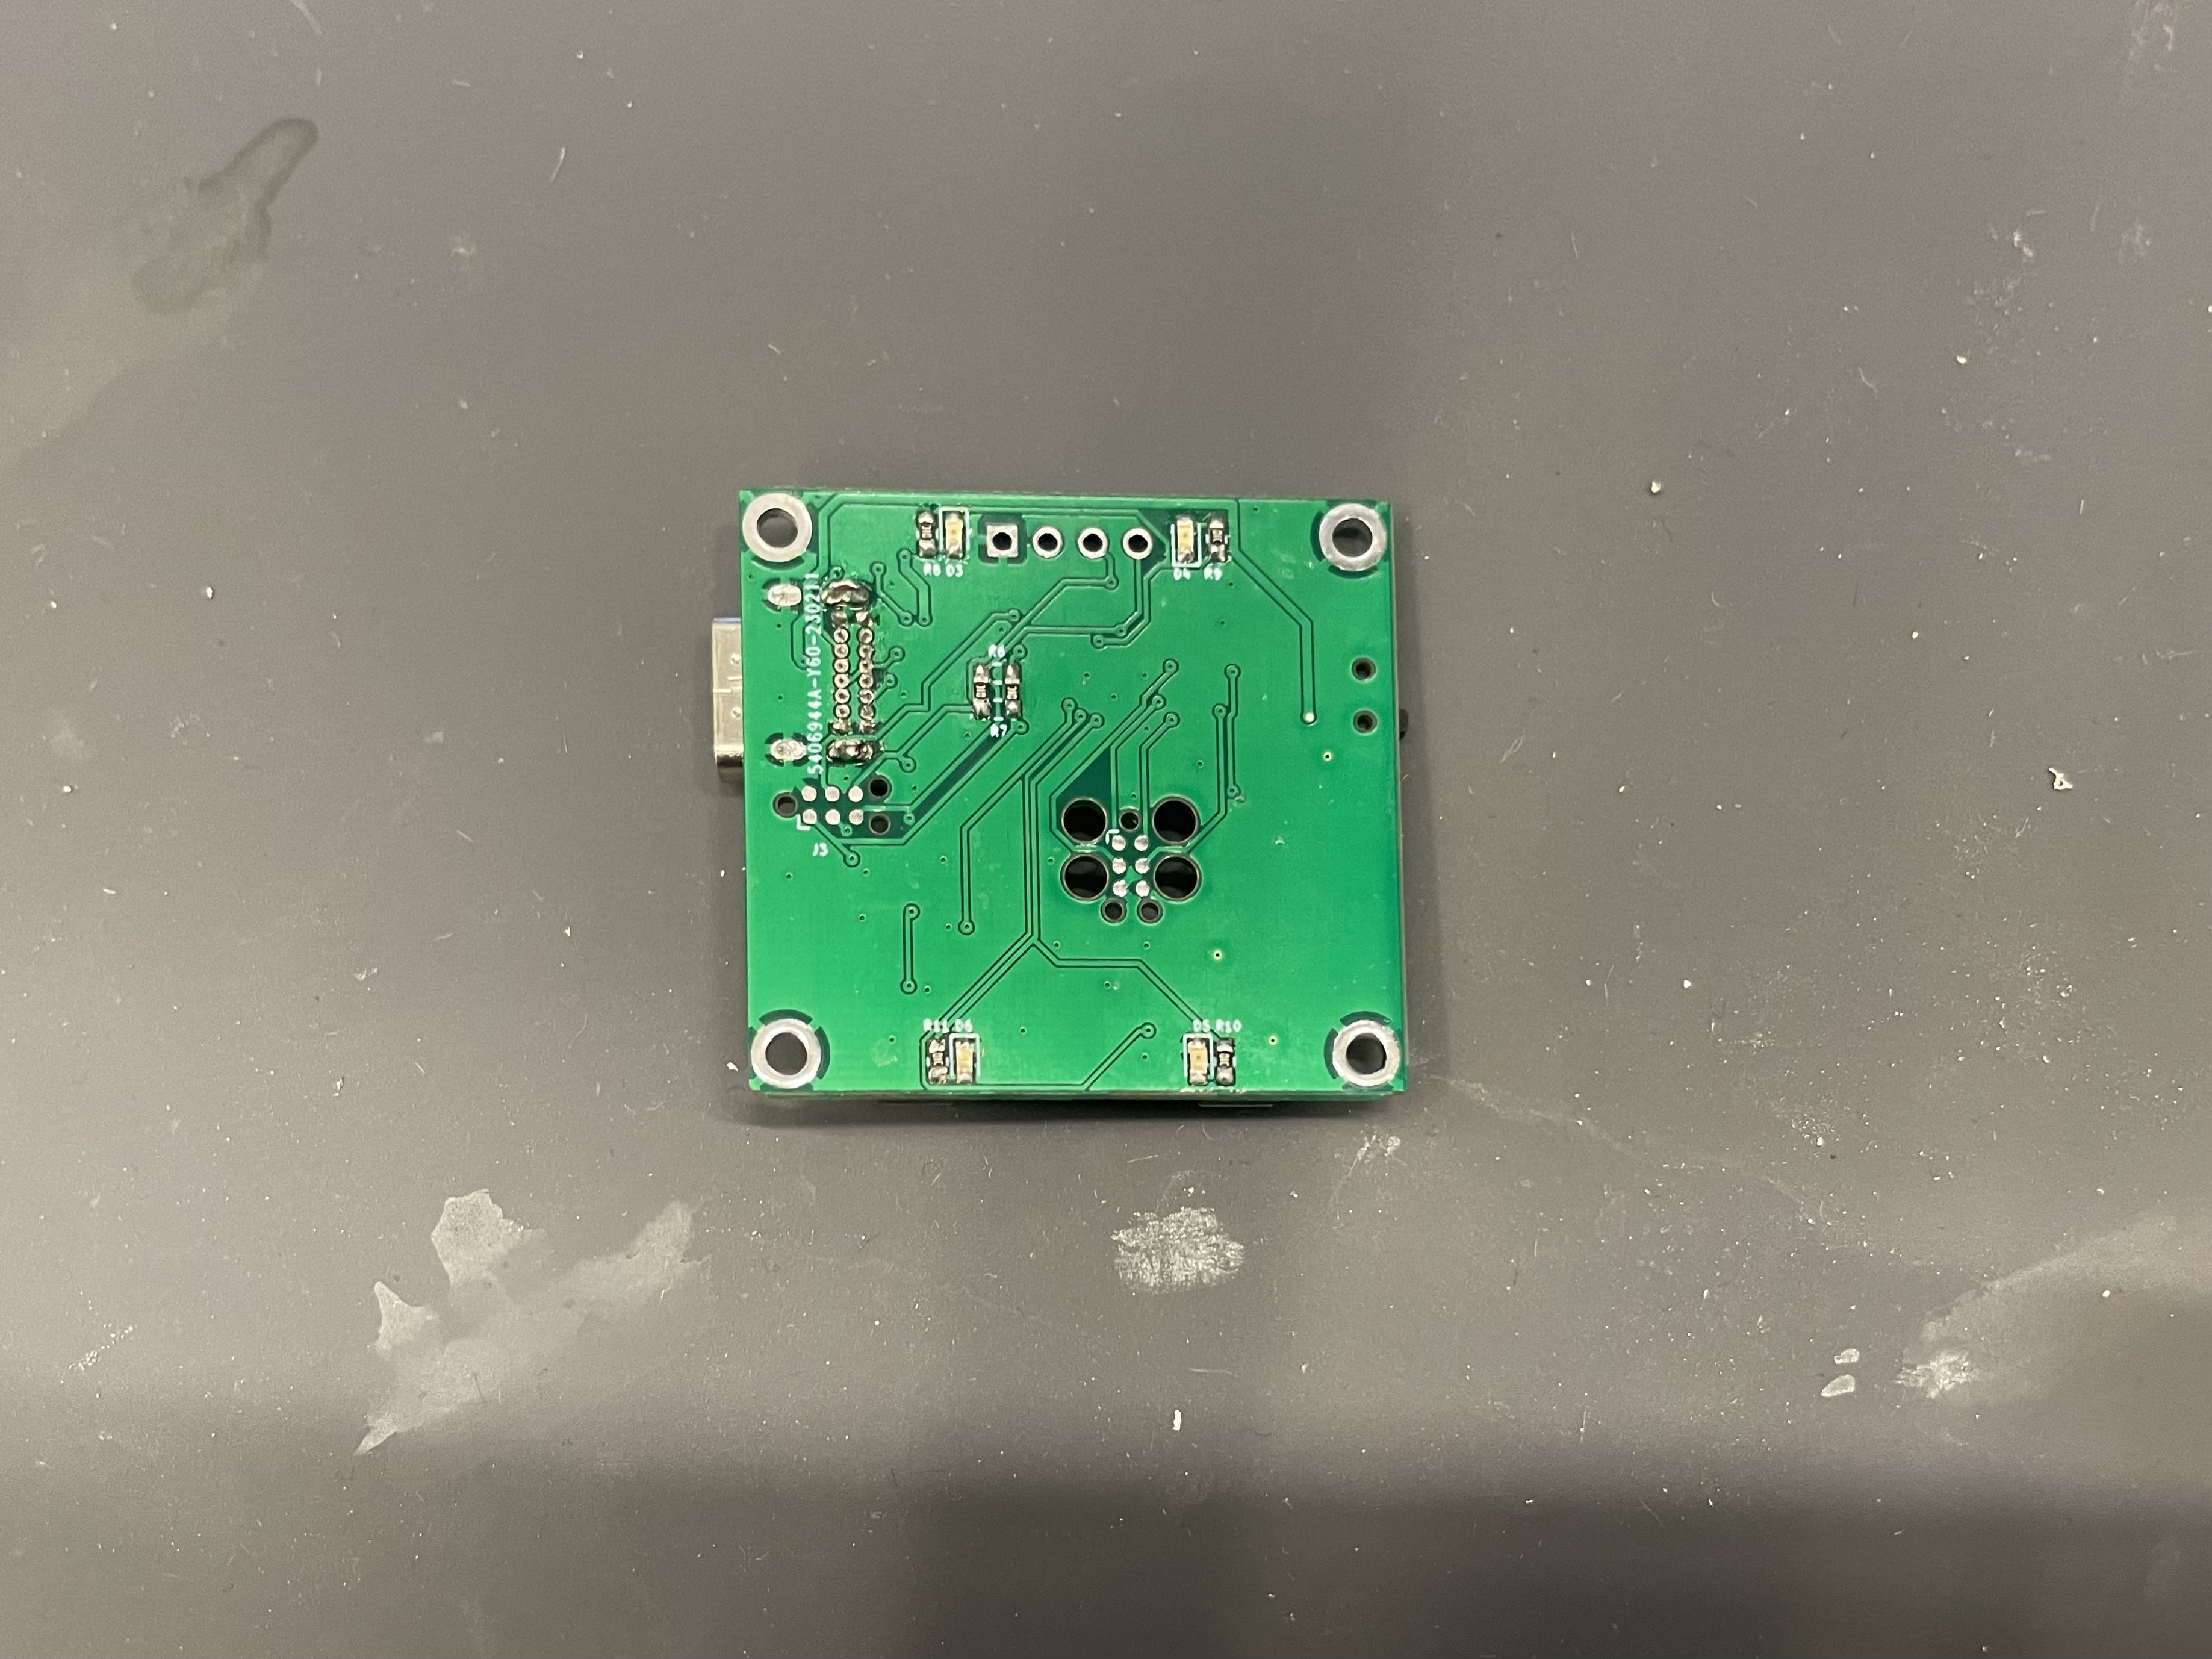 The back side of the PCB.
4- Coding
I followed the Sparkfun SAMD21 guide to setup my microcontroller, then used Arduino IDE to code the user interfaces and the IMU functionalities.
 Got an LED to blink!
 Got the OLED display working!
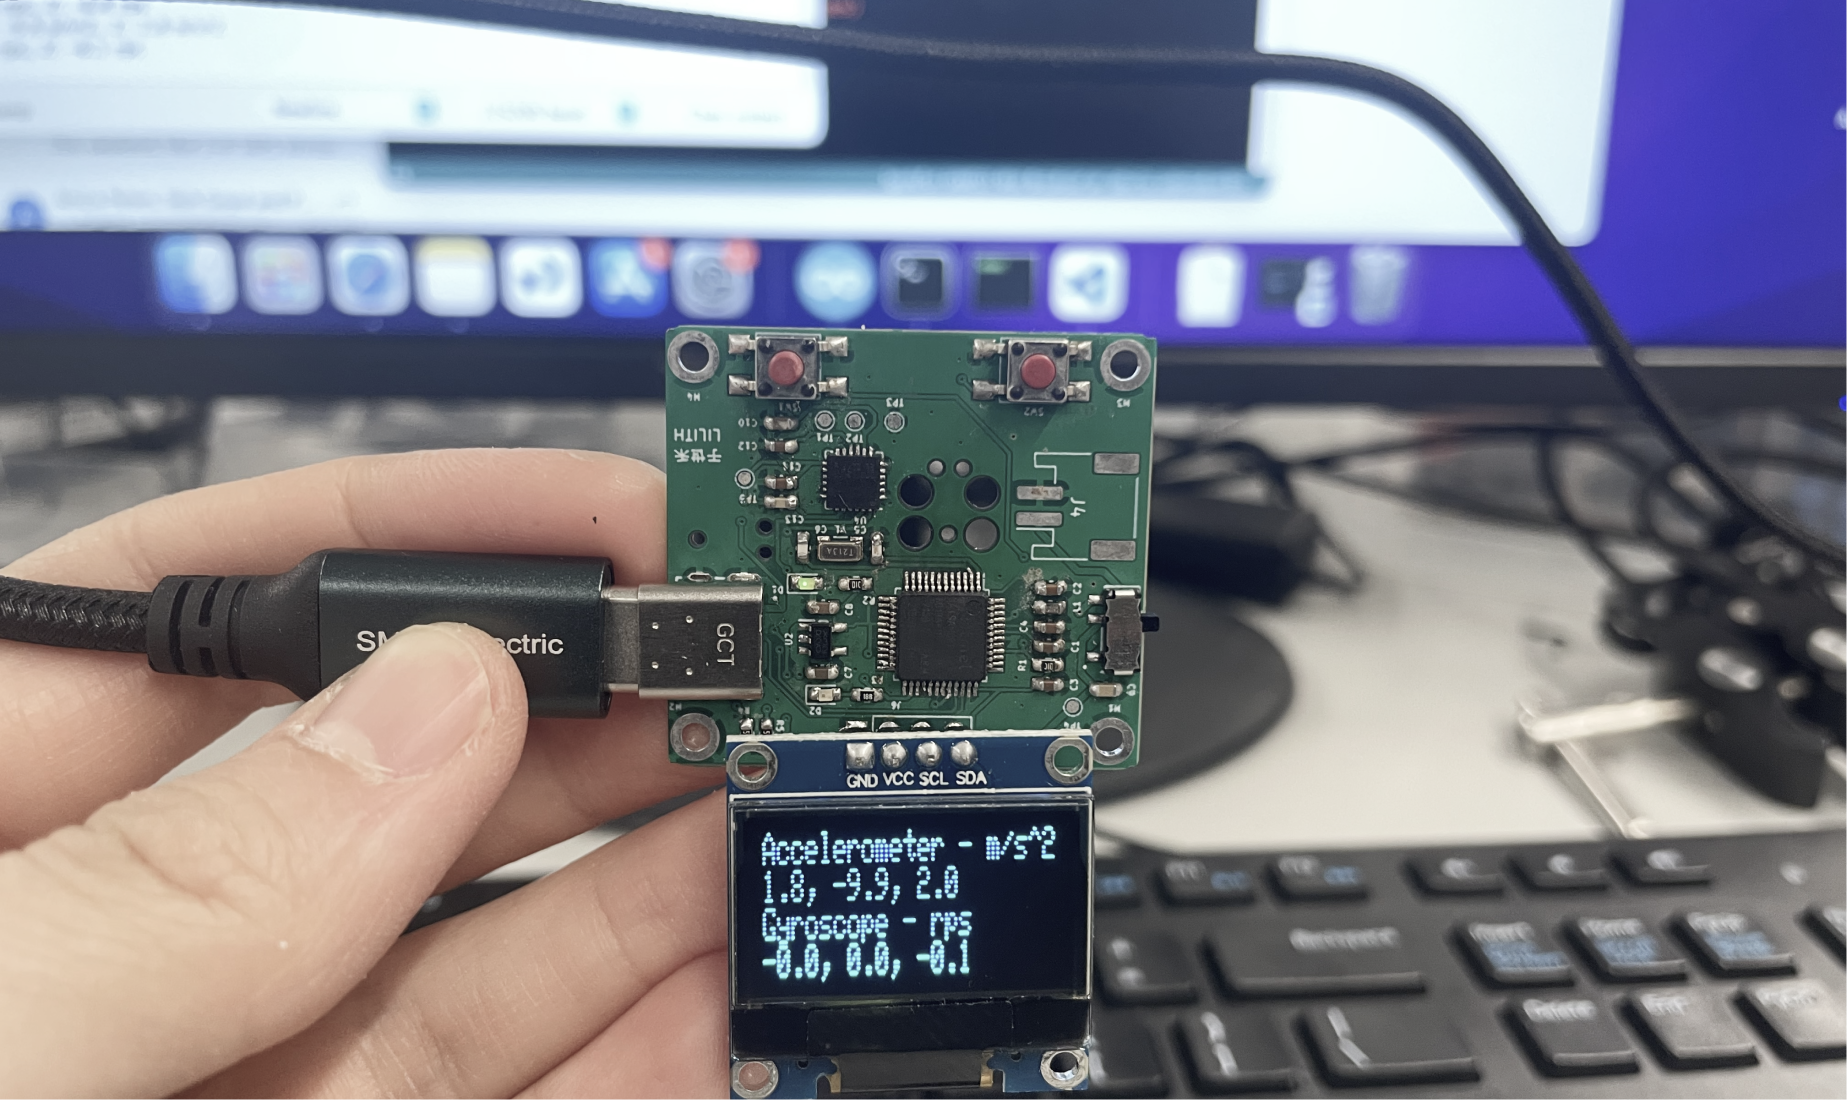 Received data from the IMU!
Here’s the link to my GitHub repo if you ever want to make your own gesture-based smart watch!
OVERALL REFLECTION
This was my first ever PCB engineering project and I have not done much electronics or electrical engineering previously. Although there was a huge learning curve, and I pulled several all-nighters to complete this project, I was surprised at how much I enjoyed working on it. I hope to do more projects involving electronics in my future crafts of interactive devices.
I also learned, thanks to Pedro’s student Jasmine Lu, about the issues of electronic waste and how the PCB design system perpetuates the single-use mindset. In my future tinkerings, I hope to incorporate more recycled parts in my PCB, and I also aim to 1. clearly document my components on the PCB so they are easy to be reused, and 2. open-source all my work so other people can build on top of it. I also really hope there could be more open-sourced information and datasheets on PCB components within commercialized products.
Overall, I’m extremely grateful for Prof. Lopes, our TA Shan-Yuan, Jasmine, and Anup for their help and all that I’ve learned from them.